Mainly a green moss and jade 'story' dress, but has lilac and turquoise in one of the voile prints; making a charming picture with lilac clematis in my garden.
Jade Moss Voile Diamonds dress
Lightweight pretty patchwork summer dress
Diamond patches in fine polyester voiles at front: Jade Green, Moss Green, Charcoal, Cream, Turquoise, Lilac.
Two part at back: same fabrics but not patchwork. Bias cut skirt gives loose fit and flare.
Lace Neck Yoke: Cotton green tinged cream. Front and back. Back lace yoke is deeper.
Patchwork is cut on bias, like back, so will flare. Unlined for coolness.
Length: shoulder to hem 36 inches. Bust suitable 34 inch. (Min 32inch, Max 36 inches). Diamonds on bias so stretches to fit.
Jade Moss Voile Diamonds dress
Summer voile dress back view
Back view has no diamond patches, but uses same fabrics as front.
Top back bodice print has butterfly design in lime green, turquoise and lilac.
Lower skirt in charcoal/jade green voile. Lime green flower and leaf prints;
Cut on the bias (diagonal weave grain) for good flare. Lower edge is flared and wide.
Back View centre
Back view lower
Front lace yoke
Back lace yoke detail
Available £95.00 on my Shamanic Nights FOLKSY Page Celtic Rose (to be added)
There is also a sister dress 'Jade Moss Butterfly' [Link] with silk painted butterfly silk frontispiece and similar lace yoke.
Sumptuous and totally unique kimono dress. Mixed fabrics: including magenta pink-red velvet devore at back and a variety of silk dyed pieces at front. Experiments with eco dyeing using plants to dye Ahimsa and Habotai silks.
LEFT SIDE SILK LOWER
Lower dress side: Habotai silk dyed in golds and purples; created by bundle dyeing [link] - Many layers of over dyeing. Definition added with logwood, lemon juice and woad. With bundle dyed silks, after steaming, outlines can be added to create 'design' shapes, like flowers. Useful when the dyed effects merge together with no design definition.
This has come out quite well; using just one piece, cut diagonally to add to each side of garment.
Additional blackberry dyed Ahimsa silk is used bottom front next to it.
LEFT SIDE SILK UPPER
Sleeve section in Ahimsa silk, bundle dyed with various flowers and leaves, and blackberries [background eco print session see Session 4 'To get some colour'. A blotchy result led to being over-embroidered.
Embroidered Celtic Triskele design of 'rounds' added to silk with overplay of abstracted chain stitch embroidered 'roses'. Added embroidered 'leaves' extend from circles down sleeve.
Black/pink cotton jersey is seen as 'cuff' below sleeve and is partial lining inside sleeves. Together with the jersey and the Ahimsa silk, the main 'body' is very warm.
Celtic Raspberry Rose Kimono right side and back
SILK SLEEVES
View shows differences between front and back kimono dress.
Sleeves have a join following down from shoulder. Different silk bundle dyed outcomes front and back sleeve sides. Front Ahimsa silk embroidered; back Habotai silk eco steamed tones.
Black and pink patched fabrics seen through crimson red lace.
Black and magenta pink cotton jersey sleeve cuff is an extension of the inner sleeve lining, echoing the pinks used on dress back. Its always a matter of what fabrics I have in stock to coordinate with.
Model 'Rose' is quite tall. shorter people would find the dress sits on or just above knee.
Vivid Magenta velvet devore and crimson cotton lace add a sumptuous tone to the lighter mottled front silks
LINING
Garment is built around an existing black/pink roses polyester printed lining which provides the collar and front buttoning section; i.e. the original front welt is used for front welt on kimono dress, and one side of the sash belt, which threads around waist and having back part elasticated. New buttons and bound button holes added. Pink silks either side of front are blackberry dyed.
Celtic Raspberry Rose Kimono Silks
Original source for Celtic Triskele design was formalised geometric plant forms within a sphere. On this silk they are not geometrically exact; the spheres have more loose design, left so to enable simplified embroidery areas. Shapes within Triskeles have been modified with lemon juice to discharge some of the left over dye colour, and to create definition in the design.
Embroidery Designs Over Eco -Dyeing
Silks Ahimsa - Chain stitch follows the outlines of the discharged Triskeles. Original development of colour on the Ahimsa silk at bottom of this page. Freestyle 'roses' are created within the Triskele design. Silk Habotai bundle dyed and modified to create appearance of roses, but no embroidery.
Celtic Triskele shapes are seen painted on with lemon juice to discharge through the blackberry and multi plant eco-dyed and steamed Ahimsa silk
This is the start of ideas to design specific coloured shapes over eco prints, to be afterwards modified to change dyed colours, and embroidered over with details. I created the 'rose' shapes where there would have been more circular triskele designs within the larger triskele. i.e. I have modified the design taken from Celtic designs: also used in wool scarf. (below)
THIS page an overview of wool dyeing and eco printing
Unusual and rarely seen Catalpa Bignoniodes leaves are interesting: for one thing they are huge, so give a good coverage. They are hard to get colour from in emersion dyeing, because although they will dye pink-crimson, it oxidises to silver on silk and pale green on wool, so when eco printing on WOOL process I've added iron (dabbed on) which gives a dulled aubergine.
Modifying 'before' and 'after'
Catalpa leaves were dipped in iron water prior to placing on wool BEFORE steaming bundle. This helped to produce a colour; aubergine. Catalpa leaves were painted over in lemon juice AFTER steaming bundle. The latter result is encouraging, as there is a good deep pink. [This would be even stronger on Habotai. The wool is too fine loose weave for holding the strongest print].
It would be interesting to see what other leaves and plants stuff can be iron water treated BEFORE steaming, and lemon juice modified AFTER. I'm currently studying how to change colours of eco prints with the many and changeable effects of mordants and modifiers.
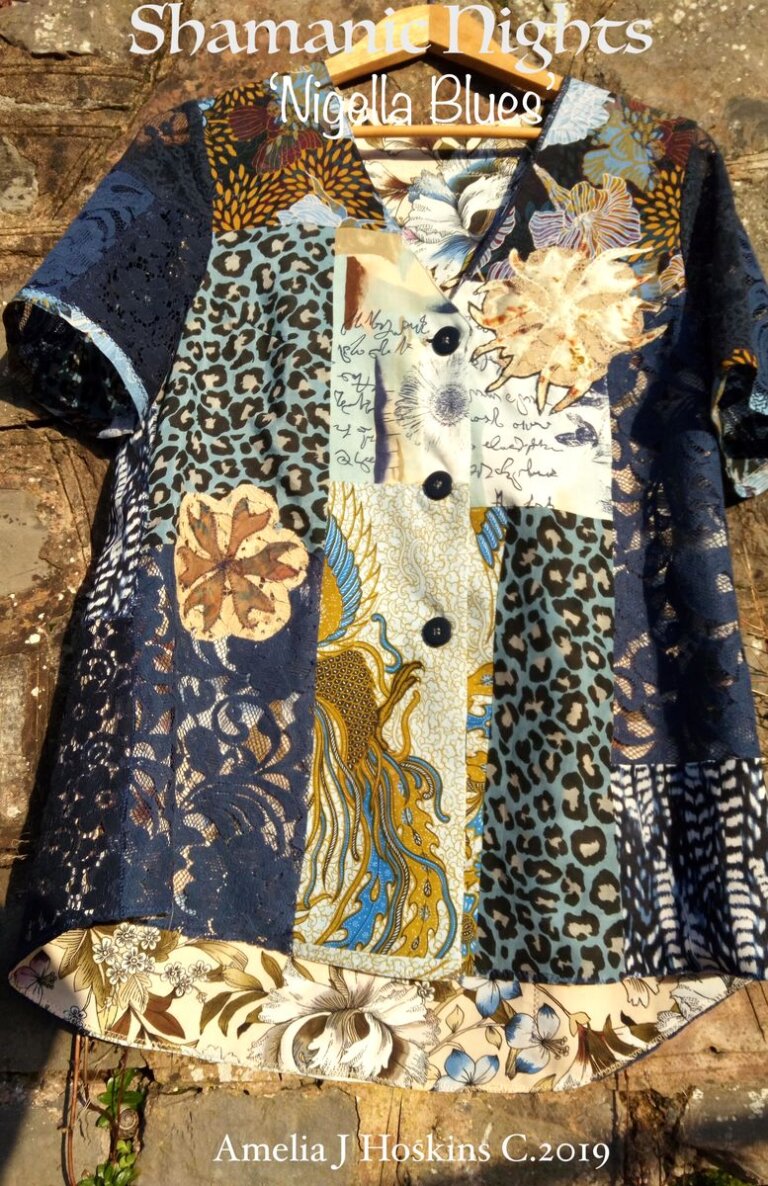
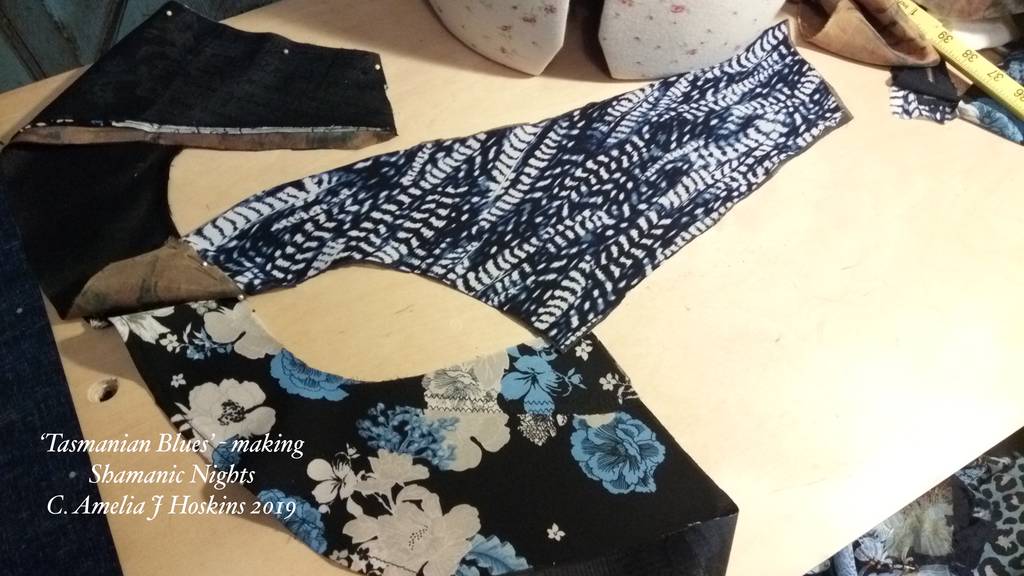
Enough patches prepared from 'Tasmanian Blues', for a smaller garment. Size and shape was dictated by the blouse used as an underlining, the colours of which were a perfect match, being cream brown and pale blue. Short sleeves made in dark blue lace. Coconut buttons with bound buttonholes [how to below]. Applique patches giant seed designs again created with eucalyptus dyed lace and bundle dyed silk. Back hem is drooped lower.
AVAILABLE : £85.00 - Direct from maker
Nigella Blues button up short sleeved smock dress - £90.00. [Shop coming SOON! and FOLKSY to add]
Nigella Blues Smock – Bound buttonhole sewing – Click to enlarge
Nigella Blues Smock – Applique making – Click to enlarge
Sumac leaves (Autumn red) - Three samples steamed together
TOP: Ahimsa silk: Previously gold dyed produced Sumac light brown eco-print - 'Earth' side. Small deep purple salvias steamed out very pale. TWO ABOVE: Hesperanthe purple flowers printed on the habotai silk 'Sun' side. BELOW: No print hardly. The silk was previously dyed blue with Hesperanthe, but it steamed out completely, leaving a 'shadow' of pink.
SUMAC jar of flower-seeds
Habotai silk soaked for a week produced strong deep gold (like eucalyptus bark). Sumac jar resulted in a deep orangey brown dye in jar in sunny window. Silk and wool strands in amaranthe jar turned pale yellow. [needs correct modifier]
Wool scarf, knotted to get a variegated effect, soaking in Sumac flower seed dye liquid.
Fine Wool soaked in Sumac 48 hours. Took on a peachy gold colour. Knots made no difference to colour saturation when opened and washed.
Sumac dyed fine wool scarf was over eco-printed with large red Catalpa Bignonionides leaves. A stronger violet-brown leaf result than Catalpa wool scarf 1; so Sumac tannin must have helped the leaf colour deepen; more so than previously over-dyed Comfrey wool scarf which stayed yellowish background. [Both Sumac flowers and Catalpa Bignoniodes leaves are both ready in November, so a good choice to try again in 2025]
Lemon juice brings out the PINK-CRIMSON of Catalpa leaves. It remains to be seen if it fades or not.
Catalpa Bignoniodes Tree - Crimson Vine type - Several experiments on Habotai silk and fine wool
The correct name for this vine tree was advised by head gardener at Overbeck Gardens, Salcombe, Devon during visit November 2024. They have a huge spread of it over wooden trellis. Large leaves turn red and deeper red/black in October/November.
Habotai (1): Tests to add more leaf prints to previously dyed habotai silk samples. Crimson vine dye bath gave pink silk in 2023, then oxidized to silver! This year testing red leaves with eco printing, rather than immersion dyeing, for better result of colour preservation.
Using Catalpa to enhance previously dyed silks: Steamed Red Catalpa leaves, Eucalyptus leaves, with sprinkled Amaranth flowers and Black Knight Scabious flower petals.
Silk folded up from bottom and over top layout - for a mirrored print result. Leaves area sponged with urine as experiment to retain red pigment. (previously dyed and eco printed silk has already been alum mordanted, which may help new prints) Bundle prepared for steaming.
Secondary additional bundle steam with Red leaves Catalpa Bignoniodes on Hab (1) areas without strong colour.
Crimson leaves Catalpa Bignoniodes on Habotai (2)
Another two previously dyed gold silks with failed eco prints to be enhanced. Red leaves with some eucalyptus and coreopsis. Two pieces of habotai silk 8 sandwiched.
Crimson leaves experiment - (no added urine sponging). Fresh red Sumac leaves dipped in a solution before placed with silk: Bucket solution: (water with used alum + dollop of rusty nail iron water + dollop of urine). Hoped to give a stronger tone to Sumac leaves, due to previous prints being pale.
SECONDARY ADDITIONAL bundle steam with red Catalpa Biognoniodes leaves on Hab. (2)
Extra Sumac leaves dipped in mordant liquid [alum water + rusty nail iron water + 2 dst sp urine]. Coreopsis Gazebo Red laced between leaves.
ADDITIONAL LEAF AND COREOPSIS STEAMING - Pre-dyed gold silk Hab. (3) test
Another gold dyed sample with secondary purple-lilac leaf prints and grey Sumac leaf prints needs MORE enhanced colour... One Catalpa crimson leaf and several Coreopsis Gazebo Red added. Clingfilm laid and rollered over folded silk. Bundle tied. Steam 20 mins. [Note: Gazebo Red stated to produce sage green; but produced purple after alum + water mordant sprinkling, combined with tannins already in the previous dye colour.]
Crimson Catalpa leaves - Experiment on Fine Wool scarf (1). Fine wool previously dyed in comfrey. Red leaves and small petals from Coreopsis Roulette (result violet-black).
RESULT - Red leaves turn purple on silk and wool after washing out. Acceptable - as in 2023 these leaves made silk a similar deep pink, then oxidized to silver. At least they produced a print. Some leaves partly faded lilac prints which gives an interesting 'ghostly' effect. (to be tried without background dye). The iron and possibly the urine mordanting helped to give a stronger tone. Coreopsis Roulette (dark violet spot) prints are darker than expected, as dried flower packet states 'Olive Green'.
If silk looks a bit dry when folding into bundle, leafs are used to dab liquid over. This aids ghostly effects where dampness is unevenly spread. When cling film is wrapped around folded silk, air is squeezed out with rolling pin either end of folded bundle. Folding lengths to a 4inch-6inch flat bundle, enables wrapping around stick, or swiss-rolling into itself, secured with string/piping cord.
2nd Steam with extra oak leaves (dipped in soya wax resist) - No iron modifyer. Oak leaves as resist didn't show any difference. Steaming will have melted out the wax. Bundle was placed in jar of red water made from soaking the Catalpa leaves several days. The wool appeared to dye red, but on washing out after 24 hours, no colour. Wool was slightly duller, needed to change the bright yellow from 1st steam.
Crimson Catalpa leaves - Experiment on Fine Wool scarf (2)
Eco print steaming 1hr 30mins. More leaves were positioned on scarf, close together, than previous scarf 1. Amaranthe was included in spaces between leaves, but no result seen apart from more blurred purple.
MODIFYING the eco printed wool, to change the darkness of the dull aubergine prints. PINK by painting on lemon juice and GREEN by painting on bicarbonate of soda.
Previously rose hip dyed wool (warm banana background). Most long leaves steamed orange-brown; a few smaller leaves produced scarlet. Centre of dahlia prints - dipped in iron water appeared slightly mauve. Purple ends are a purple salvia.
EUCALYPTUS
Subtle leaves and background result on the gold Ahimsa silk
EUCALYPTUS
Eucalyptus leaves laid on grey silk - folded over for steam printing.
EUCALYPTUS + GERANIUM Experiment
Geranium leaves dipped in slight iron water, placed sky side down over eucalyptus leaves: all over previously golden dyed habotai silk, and splashed with water that the eucalyptus leaves had been soaked in for two days; (jar with brown liquid). I must have put another grey piece over this (half the base piece size) for the result below. [Important to NOTE each step!]. Result on the larger gold habotai silk 'blanket' was hardly noticeable. Ahimsa seems to take the dyestuff better.
EUCALYPTUS
Eucalyptus leaves laid on grey silk - folded over with gold silk - smoothed and rollered, for steam printing. Brown colour was spread by the action of rollering where silk had been splashed.
With folded piece, eucalyptus leaves design runs both OVER the geranium leaves and BEHIND them. An idea to exploit again. Photo record above shows this is the earth side of the leaves; and gives a good detailed print.
Autumn 2024 - some small silk samples with current plant stuffs.
Mullein leaves dyed Habotai silk
Dyestuff collected from allotment Autumn 2024:
Soak dyestuff 24 - 48 hrs. Boil up, simmer for an hour. Add silk pieces when hand hot and leave for 2-4 days, checking for strength of colour. Heat up the slow cooker or pot each day to below boiling point, then leave silk to soak further. Silk will dye in cool liquid. Mullein took 4 days to reach golden. These samples were dyed with the dyestuff in the pots, which I don't normally do; to obtain ongoing release of pigment.
Extra samples tested with iron: either rusty nail 'iron water' or powder ferrous sulphate. Colours can be mixed by adding any dye+iron water to any plant/bark dye bath.
This year the rosehip dye result was not very strong, (previously has been peach or salmon pink); but did enable a faux 'alkanet' colour with a little iron added.
A further soak in rosehip with a good measure of iron water from dark rosemary+iron dye bath (which appeared black), produced a dull gold; the rosemary yellow being much stronger than the rosehip peach.
Blue-mauve originally dyed with Hesperanthe (lavender tone): made stronger tone with additional 2 day soaking in discarded flowers of magenta Amaranthe. (from failed eco print)
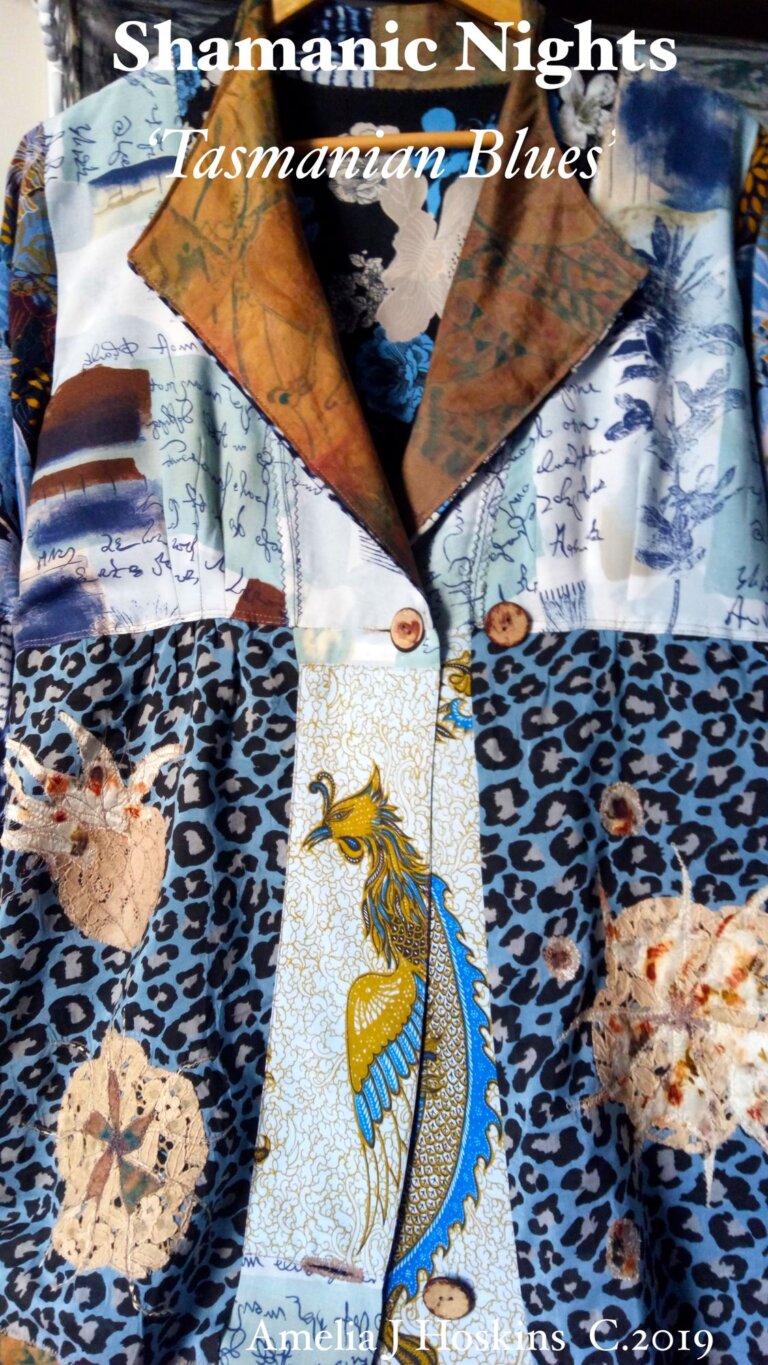
FEATURES: Collar is of hand dyed silk, from natural Tasmanian eucalyptus tree bark dye then painted over. Silk sample designs see here. [add link]
APPLIQUE DECORATION: Nigella Seed pod designs from my drawings of dried seed pods in my vegetable garden: see seed photos on photography site resonant-visions Beige lace has a similarity to the thin casings of the pods as they break down.
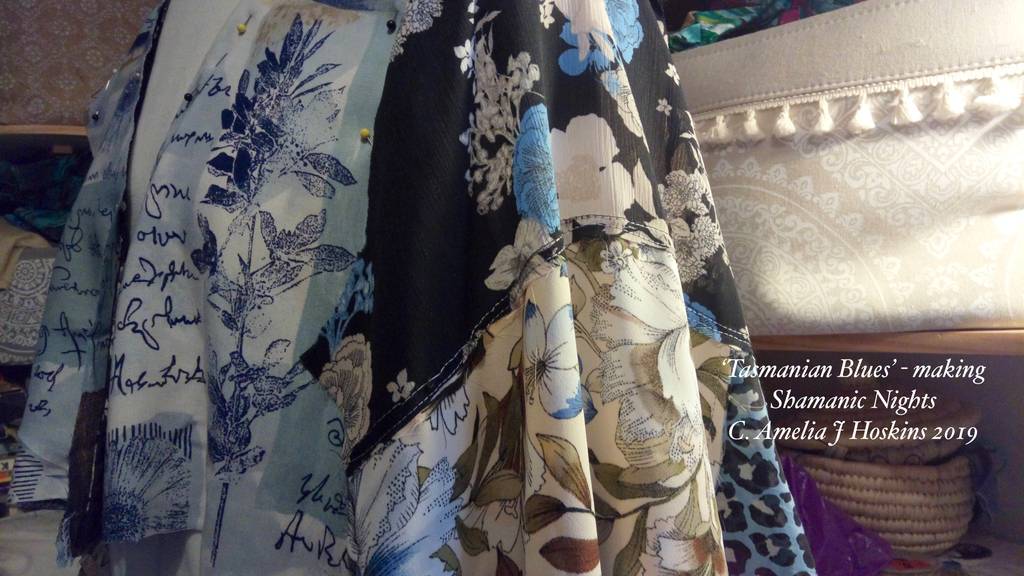
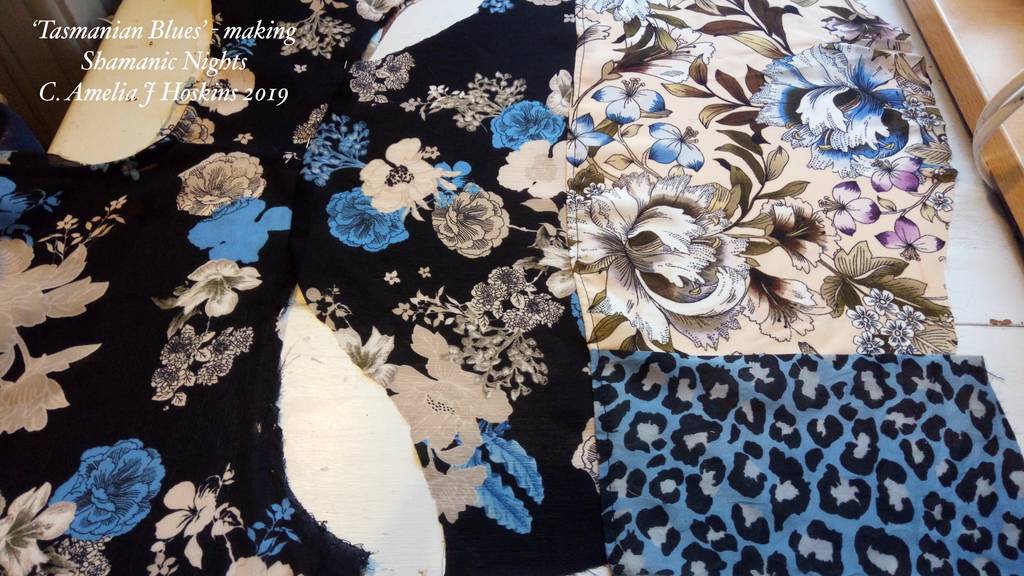
BLUE Patchworks
Abstract with text print blue/white cotton-viscose.
Feather print navy-white cotton.
Navy blue lace lined on gold.
Stylised flowers blue-gold-navy cotton print.
Gold embroidered cotton.
PLUS : Gold plant dyed silk. Leopard print blue-black-grey. Chinese Bird of Paradise with gold texture cotton.
Applique - Seed Pods of Nigella 'Love in a Mist'
Robe Dress has applique lace pod dyed in eucalyptus dye bath after the collar piece. Colour took well, which is a guide to fabric content being cotton or silk. Dark centres to seed pod designs are cut from eucalyptus dyed silk (iron modified). Light centre to pod is from bundle steam died silk with seeds and petals. Nigella blues has variable on same pod idea. A motif is a good means to join over a seam (smock left top). Also provides contrast to break up a solid dark or light area.
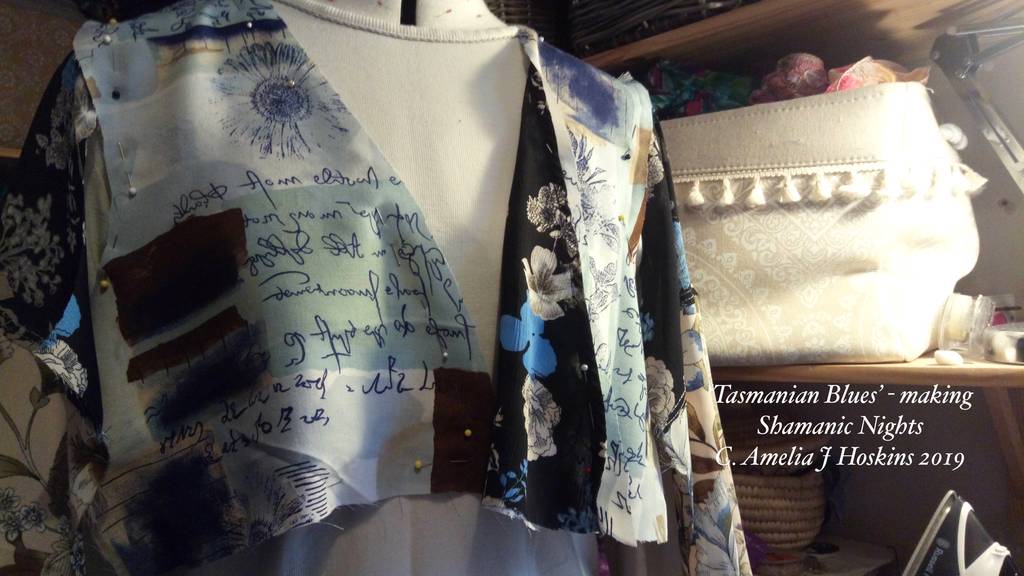
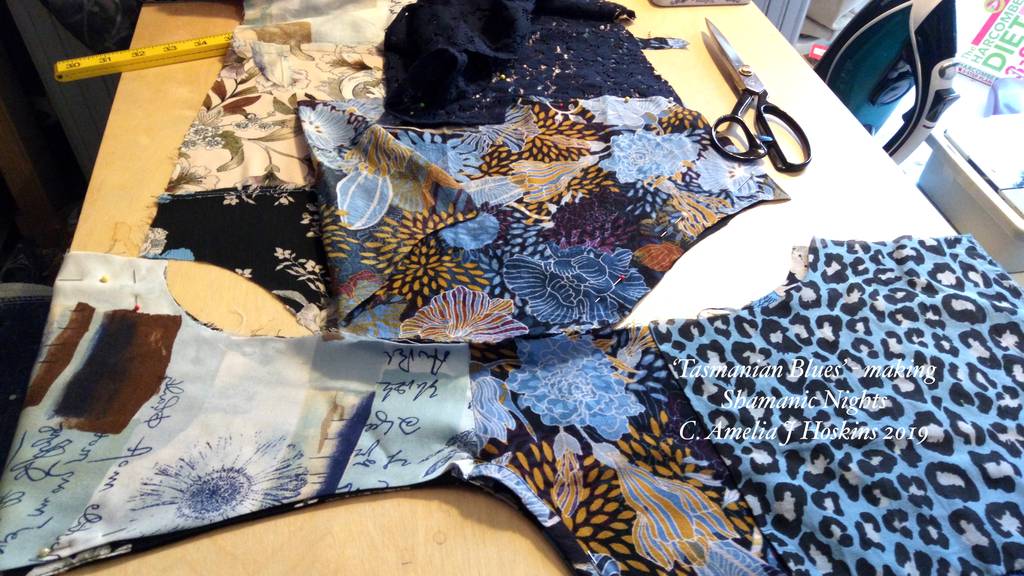
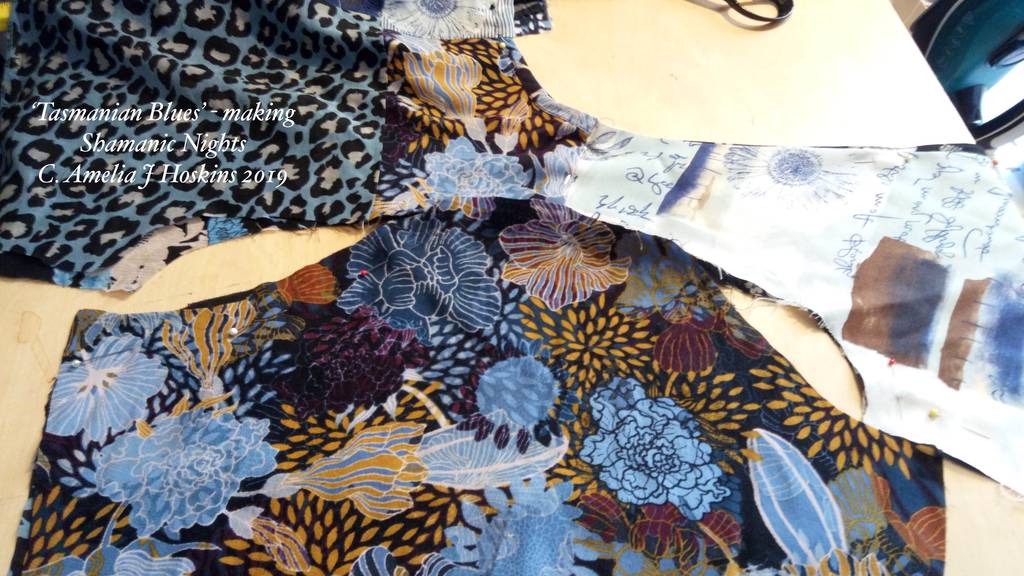
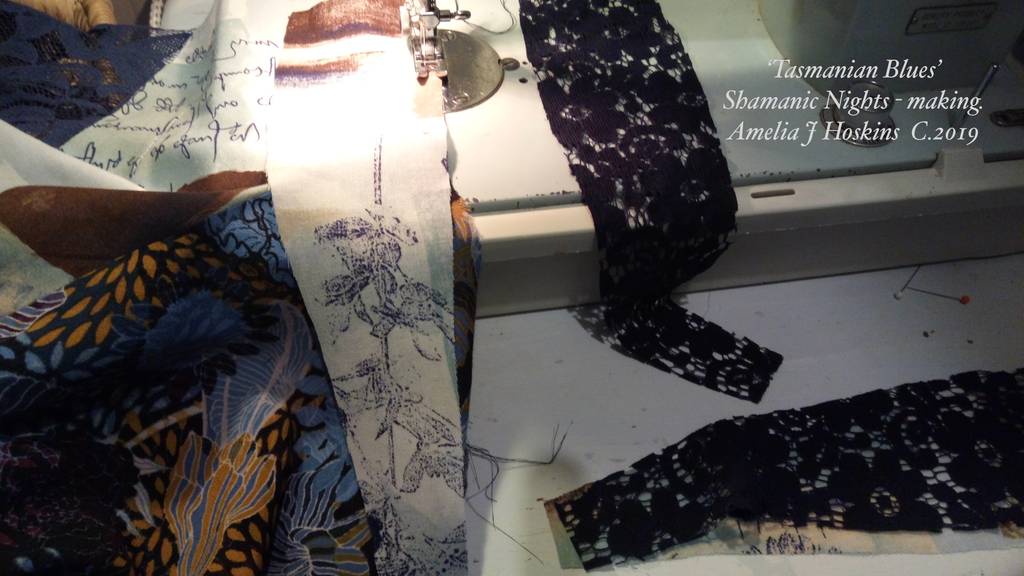
Tasmanian Blues MAKING PROCEDURE
Fitting top shape on dummy
Bodice top fitted to lining fabric
Lining (blouse) is put inside out on model, then outside patchworks pinned to it. First cut blouse neckline according to style wanted) allowing extra cm for seams.
Sleeve lining lengthened on dummy
Short sleeve (blouse) as lining, needed lengthening with cream floral thin polyester fabric. Fitted on dummy to check desired finished length of sleeve, before cutting length.
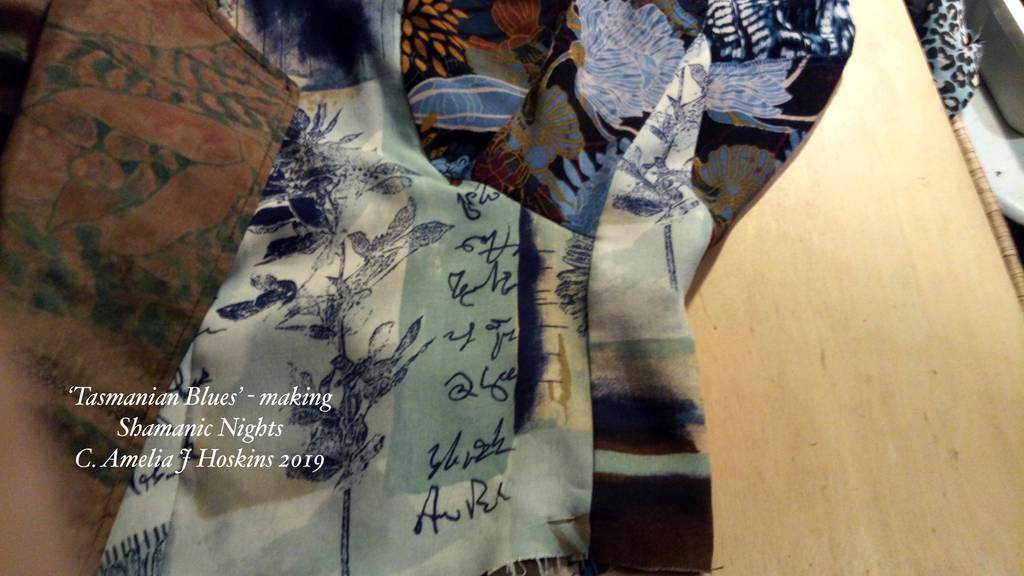
Sleeve lining lengthened patchwork
Llining of sleeve (partly made in patches), except small join at shoulder top which can remain after cutting open and flat most of the lining blouse.
Sleeve top cut to fit armhole.
Shaping sleeve top fit fit curve of bodice armhole.
Sleeve lining with outer patches added
Lining sleeve having patches added. Bodice top right has outer fabric pinned.
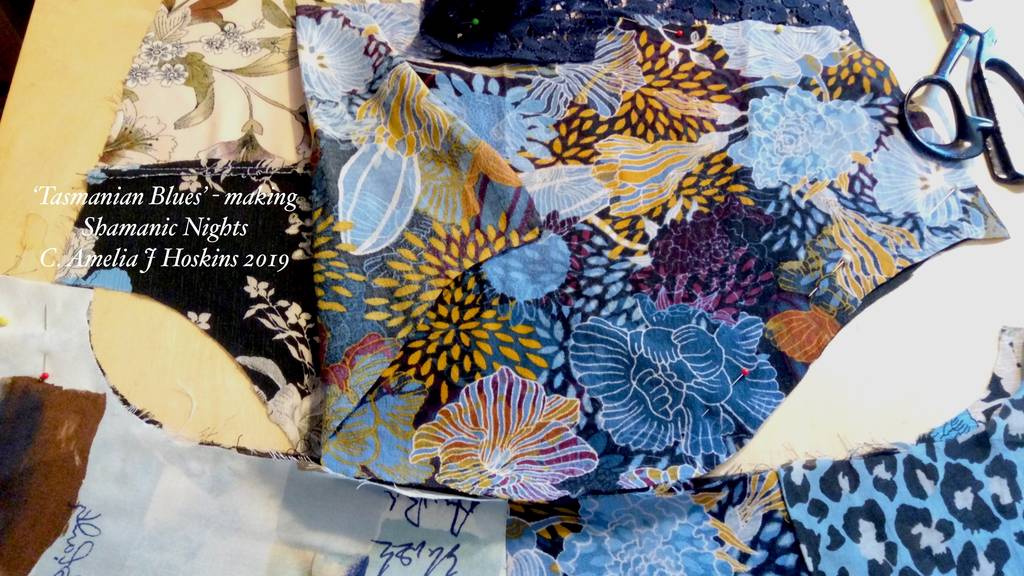
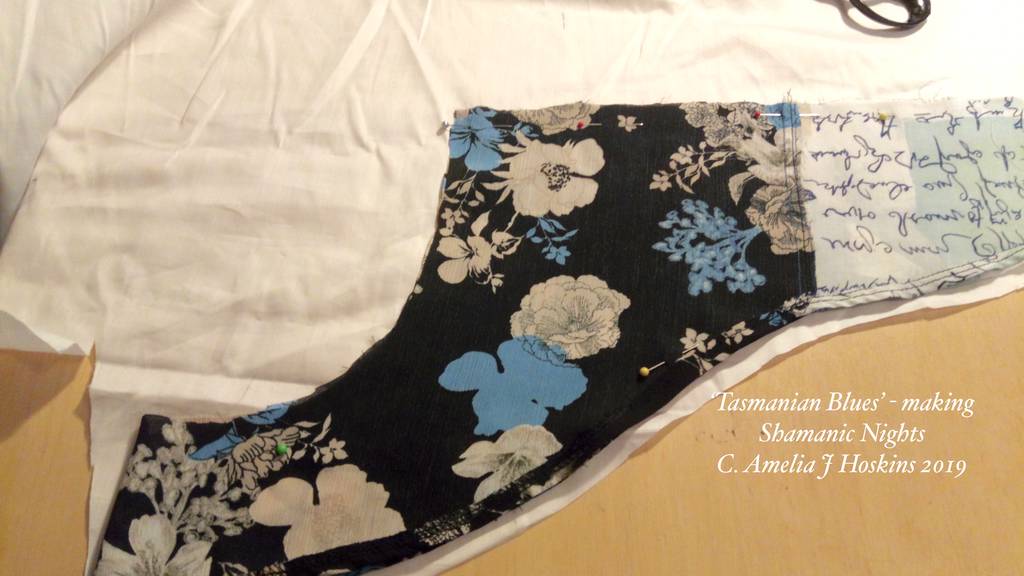
Floral patch added to upper sleeve and back top bodice
Floral patch added to upper arm with blue lace. Floral fabric used for top back bodice top. Leopard print added.
Upper sleeve both lining and upper sides ready
Sleeves layers visible ready for inserting into dress armhole.
Sleeve ready to be sewn into dress armhole
The floral patch has gold in which was a pointer to add the gold dyed silk for collar
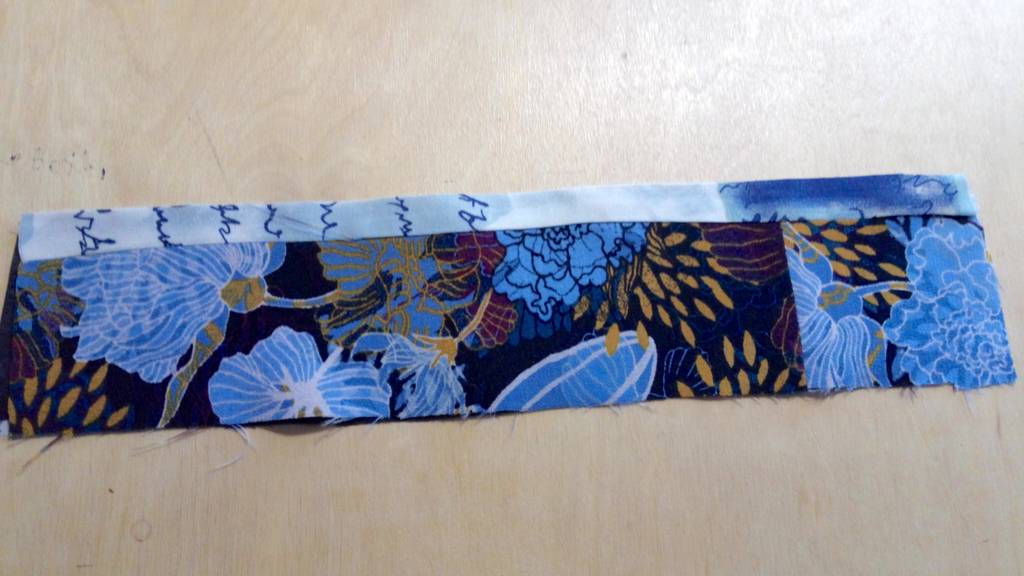
Creating Floral Sleeve Turn-ups
Fused vylene interfacing ironed onto inside of outer sleeve extension.
Sleeve Cuff Pressed
Blue and gold floral fabric used for decorative interest. Seam pressed 1cm away from outer hem, for added decorative interest, before cutting rough edges equal.
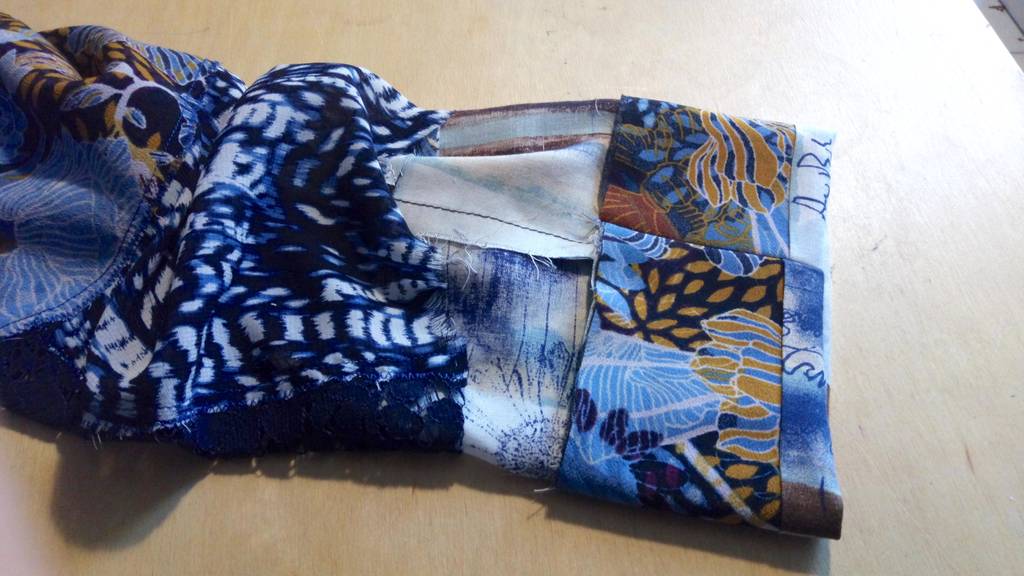
Sleeve cuff attaching to sleeve
Pin in place cuff and upper sleeve (when open and flat). Join seam down length of sleeves.
Machining Cuff to main Sleeve
After outer sleeve patches also seemed to close sleeve, smooth down outer sleeve patches to lay behind sleeve cuff. (Cuff folded over first and pressed). Pin cuff to sleeve; machine or hand stitch down, all around sleeve.
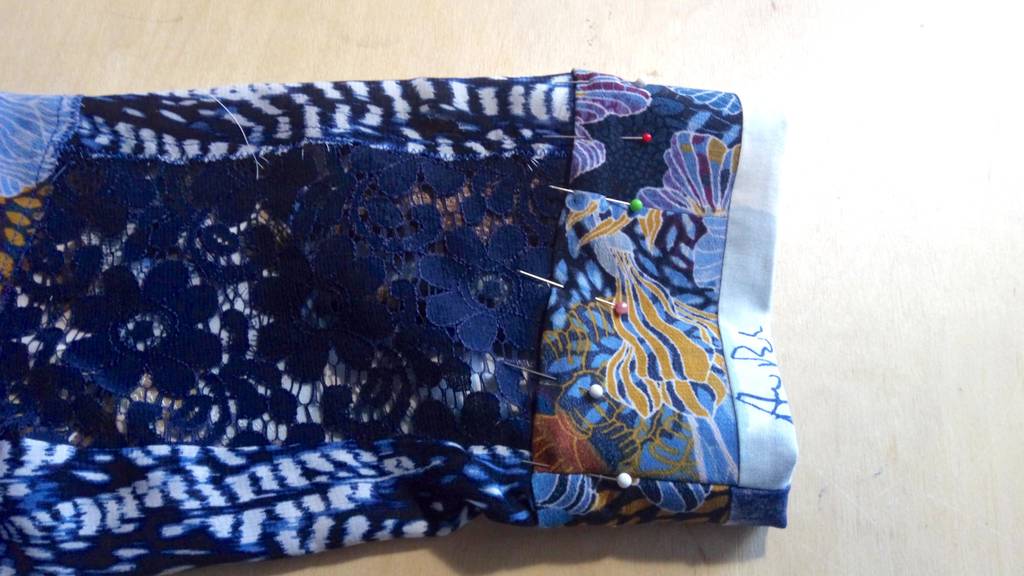
Gusset Inserted Under Sleeve
In order to increase the dress size to 38", to be larger than the lining, and to give a loose arm feel, sleeve inner and outer was left unseamed for 8 inches with 2 inch extra at armhole line. Two gussets were cut, and added one to dress and one to lining. (see machining images).
Machining under-arm gusset to dress sides
Machining gusset side to dress side, from arm seam slit point to empire bust line bodice cut. I used viscose weight for outer gusset to match with fabrics, and the blue lace for inner gusset, for light weight in the under-arm area.
Gusset inside lining piece
Lace used for the inner gusset lining; also machined to lining down length of sleeve slit, and joining bodice front and backs.
Underarm gusset completed
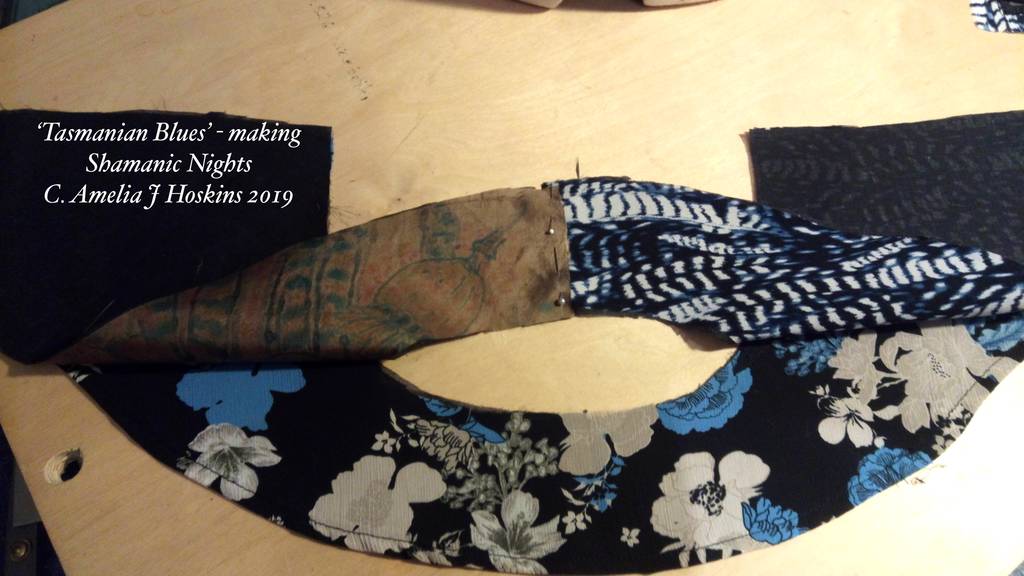
Facings for Collar Front
Join patch pieces to form a facing (take shape from back neck centre, around to front, on dummy). Pin to cotton to make a pattern to cut vylene interfacing. Or use two thicknesses of cotton tacked in.
Back Neck Section and Collar forming
Lining fabric (black/blue/cream floral) (interfaced) used as an upper back section to be inserted into a loose neckline. Smart patch colours (with gold dyed silk painting) joined to form facing, which when turned outwards, becomes the open collar. Note 'pointed angles' - when turned right way out, become collar points.
Collar and Facing forming
Patch pieces chosen for outer collar. This may be difficult to follow for beginner sewers. Whatever shape is the front of garment (e.g. a basic round neck cut down centre front): this requires a facing fabric, so when top neck is turned out, it becomes a small faux decorative 'collar'. To have a proper back collar would need additional piece inserting around back neck.
Black Knight Scabious is a strong dye flower. First test results were easy to obtain with steam bundle dyeing process. Two silk pieces: one previously dyed with iron modified blackberry (lavender) and one previously tan dyed from leaves with small orange eucalyptus prints.
FIRST steam print with Black Knight Scabious flowers
Result of Scabious steaming is seen as strong deep violet bleeding of dye colour at one edge, which must have been an open part around an end of the stick. Other flowers seem dry with barely a full print. Silk is very dry, so got too hot in pan, inside a tight parcel. Edge would have remained damp, hence the colour collected there. Pattern print not at all covering whole area, so decision made to re-dye with similar distribution of flowers, together with another silk (previously dyed with blackberry modified with weak iron dip).
Stick wrap-around method chosen for 2nd attempt with two silks. First parcel became too dry inside. Additional silk is Habotai previously dyed with blackberry (but had iron dip modifier), so grey-lavender background.
20 minute steam in pan
RESULT! A good evenly dyed print design
A good dye take up from the Scabious flowers, which had. been positioned over flat silk, similarly as first attempt; and with added sprinkling of individual Scabious tiny petals. These can be used with other steam dyes as a 'spot sprinkling' background with other eco prints.
Scabious Black Knight dried flowers on ecru Shetland wool
Top sample Dye pot (2b). GREEN: Modifed with Bicarbonate of Soda.
Second sample Dye pot (2a). Airforce BLUE: Twice as many dried flowers boiled up several times in a non stick coated pan, and rested a day or two. Wool added after reheating; left to soak around 3 days.
Third sample Dye pot (1a): GREY: First dye pot but flowers had been used in a bundle steam first. Not many flowers used, not boiled, flowers placed in boiled water soaked for 7 days.
Fourth sample Dye pot (1b): Had same process but boiled up again after in a dye pan. (Possibly had tannin residue from a bundle dye)
Images copyright Amelia Jane Hoskins Please email for use permission.
Manage Cookie Consent
To provide the best experiences, we use technologies like cookies to store and/or access device information. Consenting to these technologies will allow us to process data such as browsing behaviour or unique IDs on this site. Not consenting or withdrawing consent, may adversely affect certain features and functions.
Functional
Always active
The technical storage or access is strictly necessary for the legitimate purpose of enabling the use of a specific service explicitly requested by the subscriber or user, or for the sole purpose of carrying out the transmission of a communication over an electronic communications network.
Preferences
The technical storage or access is necessary for the legitimate purpose of storing preferences that are not requested by the subscriber or user.
Statistics
The technical storage or access that is used exclusively for statistical purposes.The technical storage or access that is used exclusively for anonymous statistical purposes. Without a subpoena, voluntary compliance on the part of your Internet Service Provider, or additional records from a third party, information stored or retrieved for this purpose alone cannot usually be used to identify you.
Marketing
The technical storage or access is required to create user profiles to send advertising, or to track the user on a website or across several websites for similar marketing purposes.